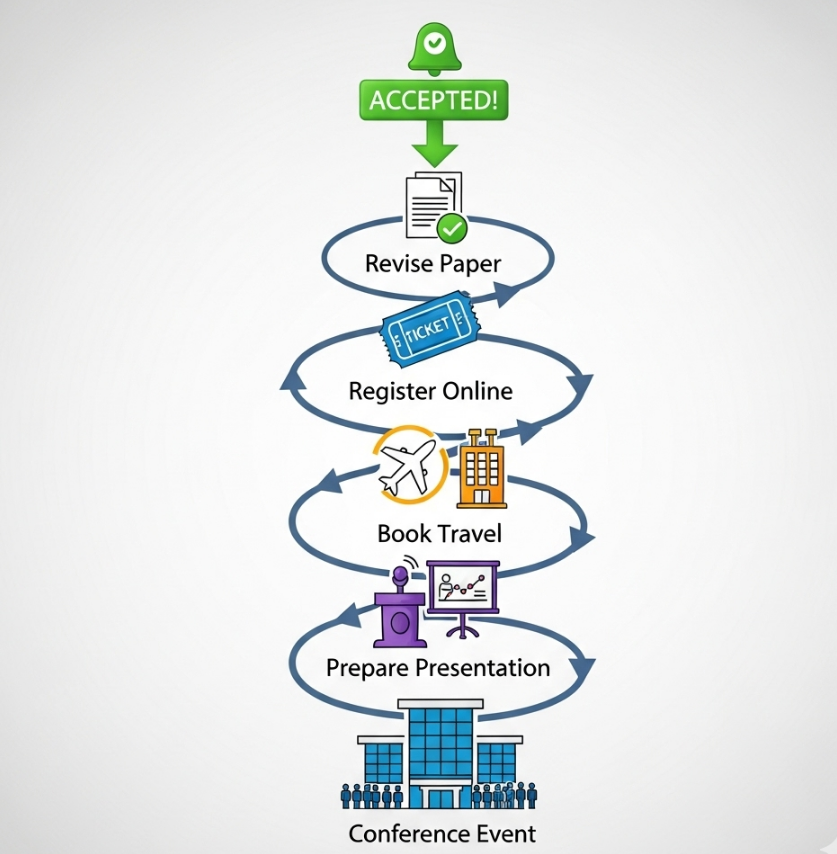
Congratulations! Receiving that acceptance email is a rewarding moment that validates all your hard work. The initial excitement, however, is often followed by a crucial question: "What do I need to do now?"
The post-acceptance process involves several critical steps to ensure your paper is published correctly and your conference experience is a success. This step-by-step checklist will guide you through everything, from finalizing your paper to preparing for your presentation.
Act on these items right away to get organized.
1. Read the Acceptance Email Meticulously This email is your most important source of information. Read it several times and look for:
Type of Acceptance: Is it for an oral presentation, a poster, a short paper, or a workshop? The requirements for each are different.
Reviewer Comments: The email will almost always include anonymous feedback from the peer reviewers. These comments are crucial for improving your final paper.
CRITICAL DEADLINES: Immediately identify and calendar the following dates:
Camera-Ready Submission Deadline: The date your final, formatted paper is due.
Author Registration Deadline: The date by which at least one author must register for the conference.
Official Instructions: Look for links to author kits, formatting templates, and copyright forms.
2. Celebrate with Your Co-authors and Supervisor Share the good news! Research is a team effort, so thank everyone who contributed. Discuss the reviewer comments with your supervisor to plan the necessary revisions.
3. Set Deadline Reminders Put the camera-ready and registration deadlines into your calendar with multiple reminders. Missing these can result in your paper being withdrawn from the proceedings.
This phase is about perfecting your manuscript for publication.
1. Carefully Address All Reviewer Comments Even though your paper was accepted, the reviewers' suggestions are meant to strengthen it. Create a separate document and respond to each comment point-by-point, explaining how you have revised the manuscript to address their feedback. This is a crucial step for producing high-quality work.
2. Format Your Paper to the Exact Conference Specifications Download the official conference template (usually LaTeX or Word). Meticulously format your revised paper according to the guidelines, paying close attention to:
Page limits
Font sizes and styles
Reference format
Figure and table captions
3. Prepare and Submit the "Camera-Ready" Paper The "camera-ready" version is the final, definitive draft that will be sent for publication. Proofread it one last time for any typos or errors. Once you are satisfied, submit it through the conference's online portal before the deadline.
4. Sign and Submit the Copyright Form You will be required to sign a copyright transfer agreement. This is a standard legal document where you transfer the publication rights to the conference publisher (e.g., IEEE, ACM, Springer). This is usually done online and is mandatory.
With the paper finalized, it's time to plan your trip.
1. Register for the Conference At least one author from your paper must register for the conference for the paper to be included in the proceedings. Make sure to register before the "Author Registration" deadline. If possible, register before the Early Bird Registration deadline to save significantly on fees.
2. Book Your Travel and Accommodation As soon as you register, book your flights and hotel. The official conference hotel can be convenient for networking, but other nearby options may be more budget-friendly. Booking early ensures better prices and availability.
3. Apply for a Visa (If Required) If you are traveling internationally, check the visa requirements for the host country immediately. The visa application process can take several months, so this should be a top priority. The conference organizers can usually provide an official invitation letter to support your application.
This is where you prepare to share your work with the community.
1. Know Your Presentation Format
Oral Presentation: Check the conference program for your time slot and the duration (e.g., a 15-minute talk + 5 minutes for Q&A is common).
Poster Presentation: Check the required poster dimensions (e.g., A0 size, landscape/portrait) and the time you are expected to be present at your poster.
2. Create Your Slides or Poster Focus on creating a clear, concise, and visually engaging presentation. Avoid dense text; use high-quality graphics, charts, and key bullet points to tell your story.
3. Practice, Practice, Practice Rehearse your oral presentation multiple times to ensure it flows well and fits within the time limit. Practice in front of your lab group or colleagues to get feedback on your clarity and delivery. For a poster, prepare a 2-3 minute "elevator pitch" to explain your work to visitors.
Getting a paper accepted is the end of one process but the beginning of another. By following this checklist, you can navigate the post-acceptance steps systematically, ensuring your paper is published professionally and you are fully prepared to make the most of your conference experience. This is your opportunity to share your work, receive valuable feedback, and build connections in your field.